 Skip to content

There is a quiet, postcard-worthy beauty to the arrival of the first major winter snowfall. As soft white flakes blanket the neighborhood, transforming trees and rooftops into a serene winter landscape, families gather indoors around fireplaces and warm kitchens. From inside a cozy living room, the winter storm feels distant and harmless. Yet, high above your head, on the surface of your roof deck, a silent and destructive physical process may already be underway.
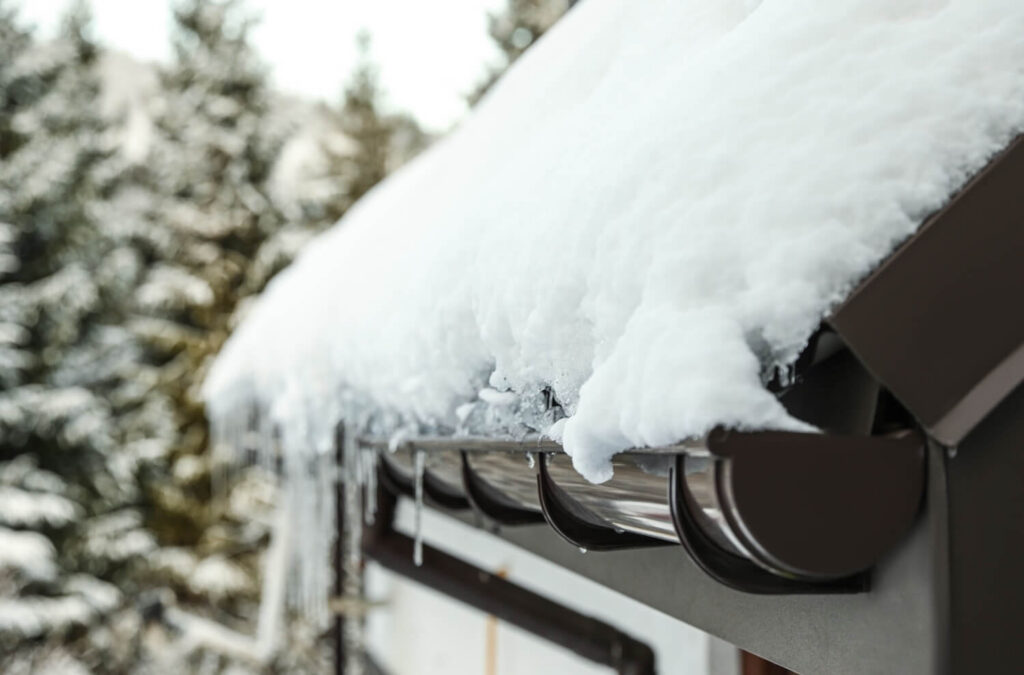
As the snow accumulates on your roof, a subtle battle of temperatures begins. While the outdoor air remains well below freezing, heat escaping from your living quarters rises into the attic space, warming the underside of the wooden roof deck. What starts as a gentle melting of the bottom layer of snowpack can quickly escalate into one of winter’s most destructive residential threats: the ice dam.
To many homeowners, the appearance of thick icicles hanging along the gutter line is simply a classic sign of winter. In reality, large icicles and heavy ridges of ice are bright red alarms signaling that your roof is under severe structural attack. Left unaddressed, ice dams force standing water underneath your shingles, soaking attic insulation, rotting structural wooden framing, ruining interior drywall, and inviting toxic mold into your living environment. Understanding how ice dams form and implementing proven prevention strategies before the first freeze arrives is the key to keeping your home safe, dry, and protected all winter long.
The Physics of an Ice Dam: How a Silent Threat Takes Shape
To stop an ice dam before it starts, one must first understand the thermodynamic mechanics that create it. An ice dam does not form simply because it is cold outside; it forms because of a sharp temperature imbalance across different areas of your roof surface.
Creating a roof ice dam requires three specific conditions working in tandem:
snow cover on the roof, warm air escaping into the attic space, and freezing ambient outdoor temperatures. The destructive cycle unfolds in a predictable, multi-step sequence:
1. Heat Loss into the Attic
During the heating season, warm air naturally rises toward the highest points of your home. If your attic floor lacks airtight sealing or adequate insulation, this thermal energy escapes directly into the unconditioned attic space. Unsealed attic hatches, recessed lighting fixtures, bathroom exhaust fans, and electrical wire penetrations act as thermal chimneys, pouring heat into the space beneath the roof deck.
2. The Melting Cycle
As trapped household heat warms the attic air, the temperature of the upper roof deck rises past the freezing mark of 32°F, even while the outside air remains at 20°F or colder. This warm roof deck melts the bottom layer of the snowpack resting directly on the shingles. Liquid water trickles downward beneath the insulating blanket of snow, flowing along the sloped roof plane toward the eaves.
3. The Freeze at the Eave
When the cascading meltwater reaches the eave overhang, the portion of the roof that extends past the exterior walls of the house, it encounters a radically different thermal environment. Because the eaves are not positioned over a heated living space, their surface temperature matches the freezing outdoor air. As the liquid water hits this cold overhang and the metal gutter troughs, it instantly freezes.
4. The Hydraulic Wedge
Over hours and days of continuous melting and refreezing, a solid ridge of ice builds up along the eave line, forming a physical dam. As additional snowmelt flows down the roof slope, it hits this ice barrier and has nowhere to go. A standing pool of liquid water collects behind the ice dam.
Because standard roofing materials like asphalt shingles are engineered to shed gravity-driven water flowing downward, not hold standing pools of liquid, the trapped water finds the path of least resistance. It backs up underneath the shingle laps, wicking horizontally into the building envelope.
The Hidden Cascade of Interior and Structural Damage
The true danger of an ice dam lies in what happens after standing water penetrates the outer shingle layer. Once liquid bypasses the primary weather barrier, a rapid cascade of secondary damage spreads throughout the building structure:
Saturated Attic Insulation
When water seeps through the roof sheathing, its first stop is usually your attic insulation. As fiberglass batts or blown-in cellulose absorb water, they lose their thermal resistance (R-value). Wet insulation can no longer trap air, causing even more heat to escape from your living space into the attic. This thermal failure accelerates the roof-melting cycle, making the ice dam larger and drawing even more water into your home.
Structural Decking and Rafter Rot
Persistent moisture saturation rots the wooden plywood or oriented strand board (OSB) roof sheathing, as well as the underlying structural rafters and trusses. Rotted wood deck boards lose their structural integrity, causing soft spots, sagging rooflines, and a complete loss of fastener holding power. Nails holding the shingles in place can pull loose, leaving the roof highly vulnerable to wind uplift.
Interior Ceiling and Wall Destruction
As water continues to accumulate inside the attic envelope, it drips down onto the top of your living room or bedroom ceiling drywall. Over time, yellow or brown water rings expand across interior ceilings, paint begins to bubble and peel, wallpaper detaches, and plaster weakens. In severe cases, ceiling drywall becomes so heavy with absorbed water that it collapses into the living space below, destroying furniture and personal belongings.
Toxic Mold and Indoor Air Quality Risks
A dark, damp, and warm attic space created by trapped water provides the ideal incubator for mold and mildew. Mold spores can begin colonizing wet wood and drywall within 24 to 48 hours of exposure. As mold colonies flourish inside the attic and wall cavities, fungal spores migrate into the home’s HVAC ductwork, exposing your family to severe respiratory hazards, allergic reactions, and persistent musty odors.
The Prevention Blueprint: Five Steps to Stop Ice Dams Before They Start
Waiting for an active ice dam to form before taking action forces you into a high-stress, expensive emergency response. The most effective way to protect your home is to implement a comprehensive, pre-winter prevention strategy that addresses root causes rather than symptoms.
1. Air Seal the Attic Floor
The single most critical step in ice dam prevention is stopping heat from escaping into your attic in the first place. Inspect your attic floor and seal all bypass openings using expanding foam, caulk, or specialized fire-rated sealants. Pay close attention to:
- Unsealed attic access hatches and pull-down ladders.
- Gaps around plumbing vent stacks and electrical wire penetrations.
- Openings surrounding recessed ceiling lights (can lights).
- Chases around chimneys and furnace flues.
2. Upgrade Attic Thermal Insulation
Once air leaks are sealed, ensure your attic floor has sufficient thermal insulation to keep heat where it belongs, inside your living quarters. In cold winter climates, energy codes recommend insulating attic floors to an R-value between R-49 and R-60 (roughly 16 to 20 inches of high-grade insulation). Proper insulation creates an effective thermal blanket that keeps the attic floor warm while leaving the air space above cool.
3. Establish Balanced Soffit-to-Ridge Ventilation
Airflow is the secret weapon in maintaining a uniform, cold roof deck. A balanced ventilation system continuously draws cool outdoor air in through intake vents located along the lower soffit overhangs, channels that air along the underside of the roof deck, and exhausts warm air out through continuous ridge vents at the roof peak. Install rafter baffles (vent chutes) along the eave edges inside the attic to ensure loose insulation does not block soffit intake airflow.
4. Upgrade to Self-Adhering Ice and Water Shield
When replacing your roof, ensure that your contractor installs a heavy-duty, self-adhering polymer-modified ice and water shield membrane directly over the wood deck. This specialized leak barrier should extend from the eave edge inward to a point at least 24 inches past the interior warm wall line, as well as along all valleys, dormers, and skylights. If an ice dam does form during an extreme winter storm, this self-sealing membrane grips tightly around every nail shank, preventing backing-up water from penetrating the wood deck.
5. Install Self-Regulating Trace Heating Cables
In microclimates subject to extreme snowpack or on complex roof designs featuring valleys that collect heavy drifts, installing self-regulating heat cables along the eaves and gutters provides an added layer of automated protection. Modern commercial-grade heat cables adjust their thermal output based on ambient temperatures, melting open drainage channels through snow accumulation so meltwater can drain safely into downspouts.
Partnering with Oregon’s Certified Winterization Experts
Protecting your home against harsh winter weather requires a professional partner who understands regional building science, structural engineering, and complete weather-barrier installation.
Deschutes Roofing stands as a premier family- and veteran-owned contractor dedicated to safeguarding homes against severe seasonal weather across Oregon. Their factory-certified teams take a comprehensive, system-wide approach to winter preparation, evaluating not just exterior shingle health, but attic insulation levels, air sealing, and balanced soffit-to-ridge airflow to stop ice dams before they ever take root.
When an emergency winter storm strikes, Deschutes Roofing provides safe, specialized low-pressure steam ice dam removal services to clear heavy ice ridges without damaging your underlying roof envelope. If your roof requires structural repairs or a full winterization upgrade, their status as a GAF Master Elite® Contractor, Owens Corning Preferred Contractor, and Malarkey Emerald Premium Contractor allows them to back their work with non-prorated product warranties lasting up to 50 years, alongside robust workmanship guarantees.
Frequently Asked Questions (FAQ)
What is the main cause of ice dams on a residential roof?
Ice dams are primarily caused by heat escaping from the living space into an uninsulated or poorly ventilated attic. This warm air heats the underside of the roof deck, melting the snowpack above. The meltwater trickles down to the cold eave overhang, where it refreezes into a ridge of ice, trapping subsequent water runoff.
Are large icicles hanging from my gutters always a sign of an ice dam?
While small, thin icicles can occasionally form during normal winter melting, thick, heavy clusters of icicles hanging directly from the eave line or behind gutters are a primary warning sign that an ice dam is forming and holding standing water on your roof deck.
How far up the roof deck should an ice and water shield be installed?
Building codes mandate that a self-adhering ice and water shield membrane must extend from the lowest eave edge upward to a point at least 24 inches inside the interior warm wall line of the home. In areas prone to severe snow accumulation, extending this barrier 36 to 48 inches up the slope or across entire valleys offers superior protection.
What is the safest way to remove an existing ice dam from my roof?
The safest and most effective method is hiring licensed professionals who use low-pressure, high-temperature industrial steam equipment. Steam gently melts channels through the ice using heat rather than force, allowing trapped water to drain without cracking brittle shingles or damaging metal flashings.
Conclusion: Secure Your Sanctuary Before the First Freeze
Winter in the Pacific Northwest and High Desert brings stunning landscapes, but it also tests the limits of your home’s primary protective shield. Treating ice dams as an unavoidable winter inconvenience is a risky gamble that invites structural wood rot, ruined insulation, toxic mold, and high energy bills into your sanctuary.
By taking a proactive approach before the temperature drops, sealing attic air leaks, upgrading insulation, ensuring balanced ventilation, and installing self-sealing leak barriers, you transform your roof into an impenetrable winter envelope.
When you are ready to prepare your home for the coming freeze, trust the factory-certified experts at Deschutes Roofing to deliver honest guidance, meticulous craftsmanship, and complete winter protection. Contact Deschutes Roofing today to schedule your comprehensive pre-winter evaluation, explore your financing choices, and enjoy a warm, dry, and worry-free winter season.